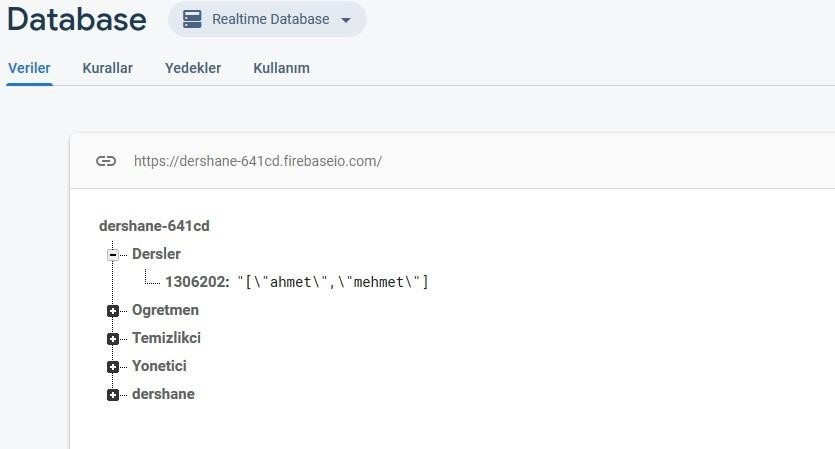
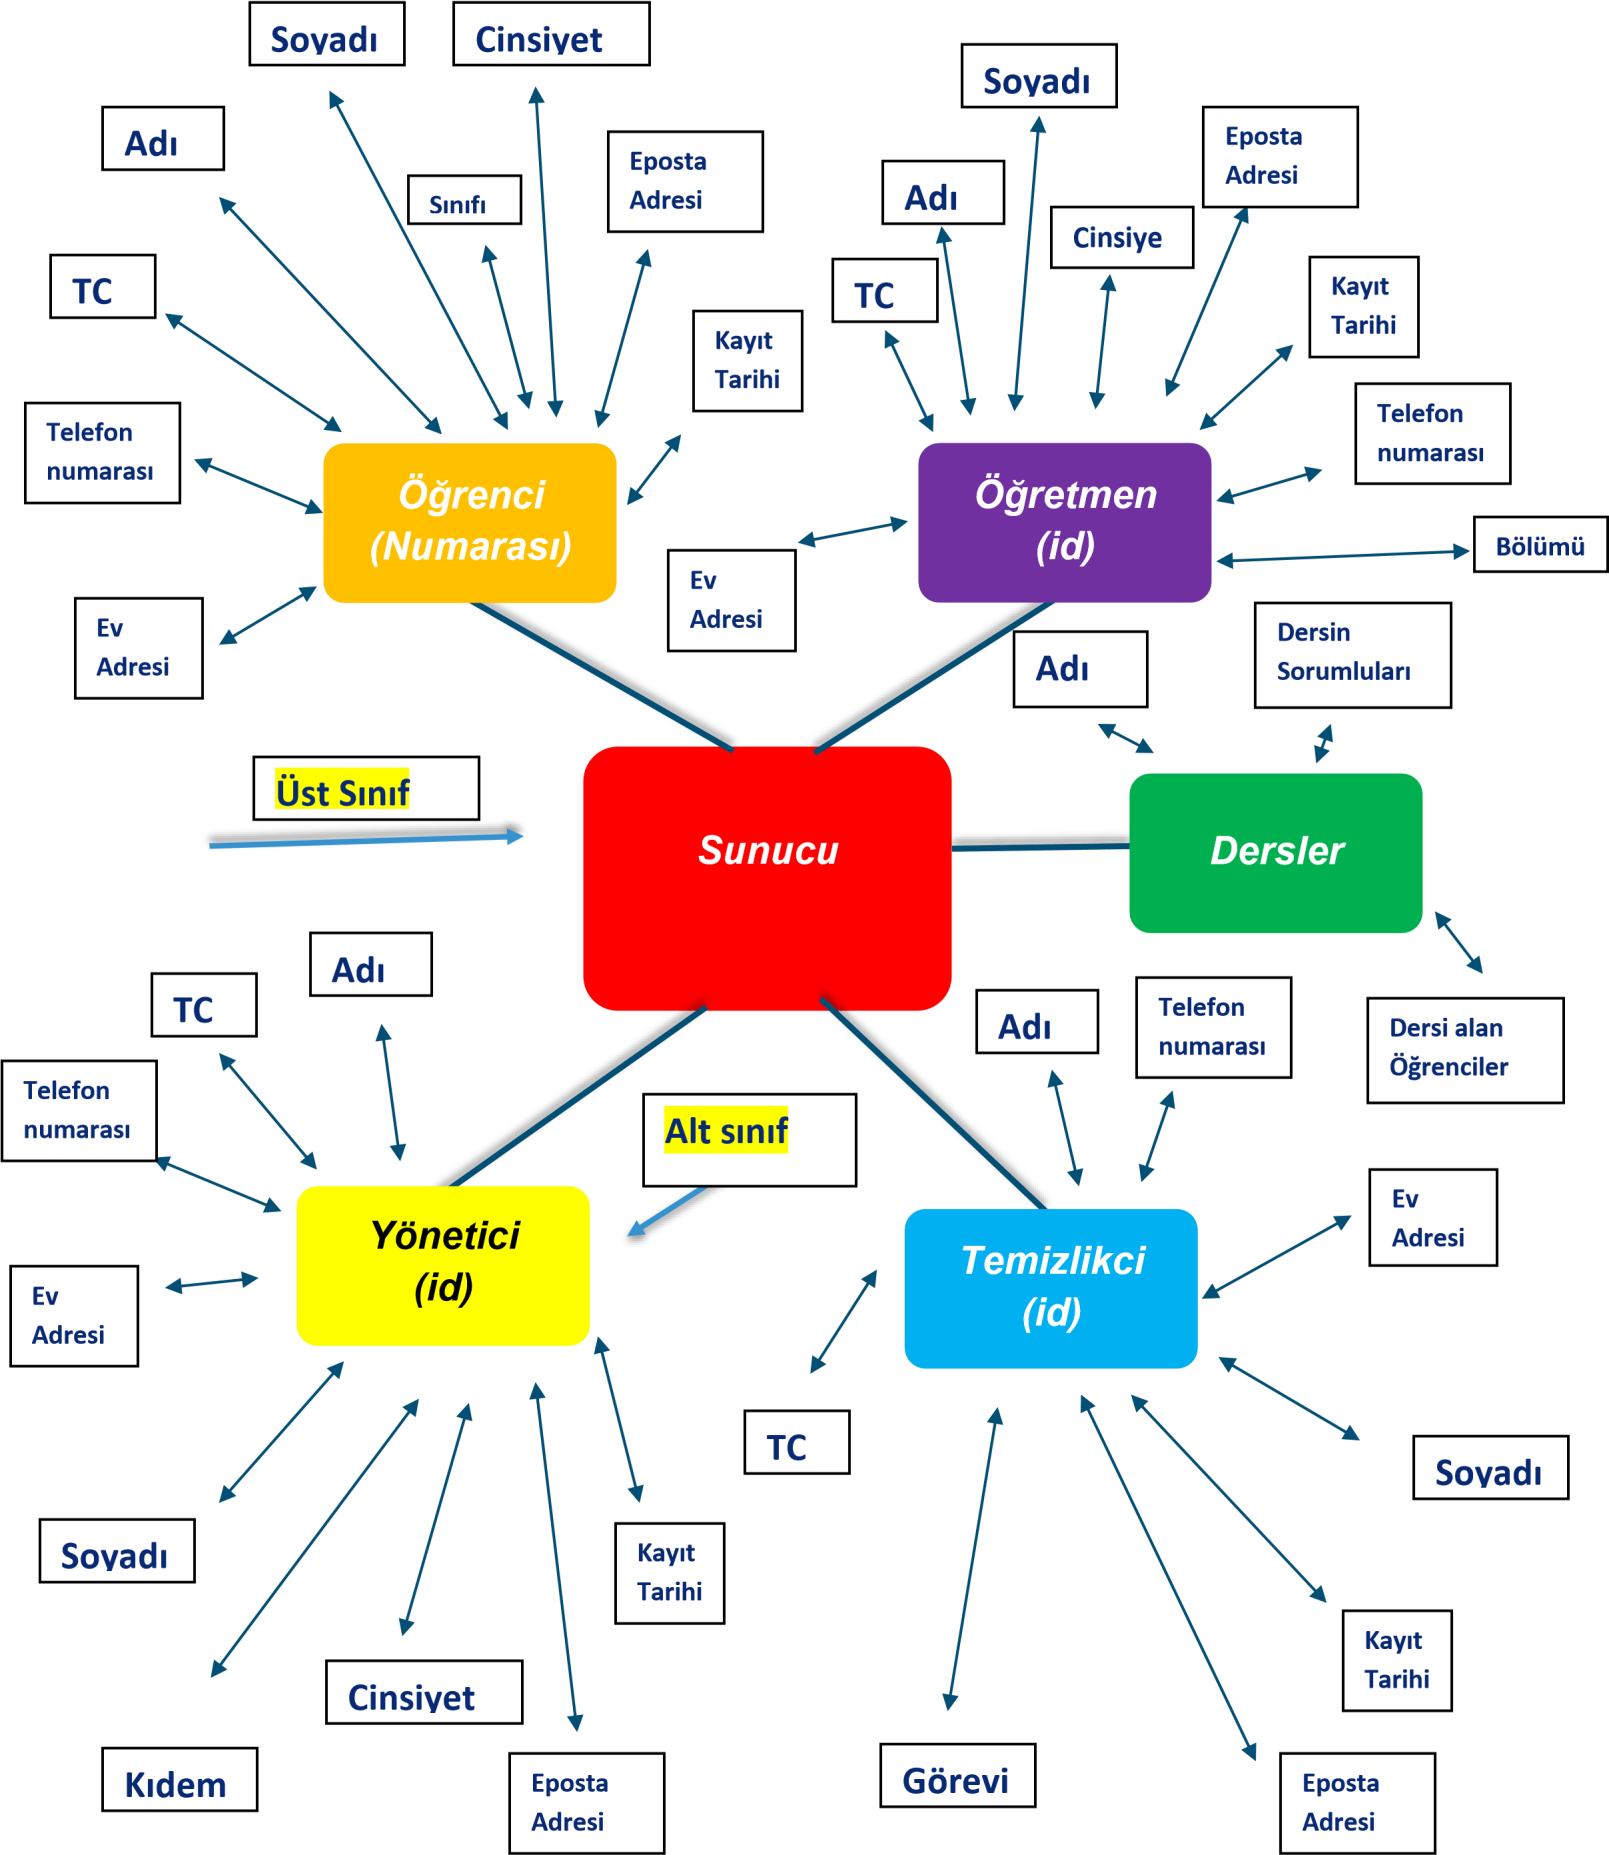
School registration system
The application home page is seen like this. Each option opens a new registration form.
Back Next
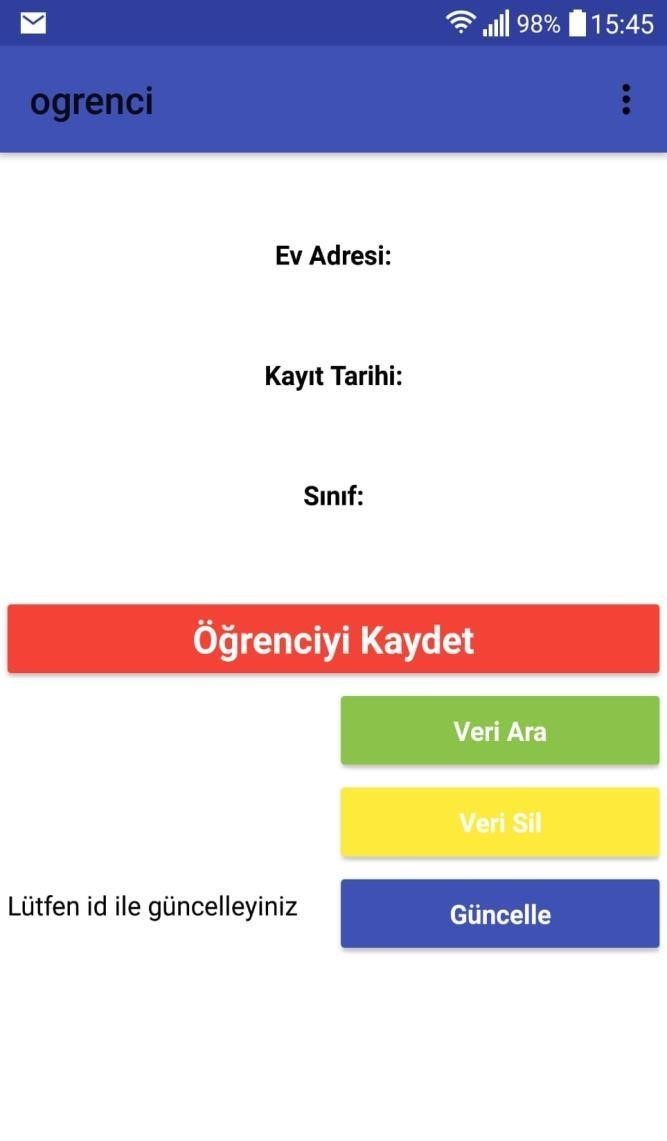
Student registration
Student enrollment information looks like the figure. With the "Öğrenci Kayıt" button, the data are saved to the server.
Back Next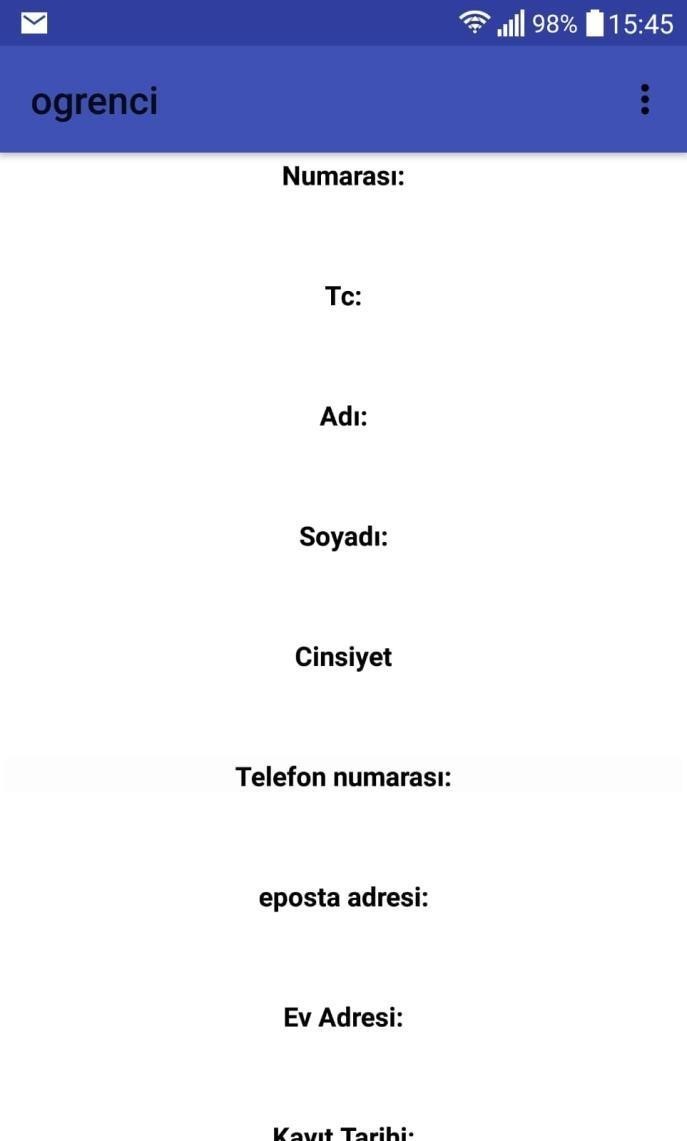
Search Data
With the "Veri Ara" button (via id) this data is searched and displayed under the application.
Back Next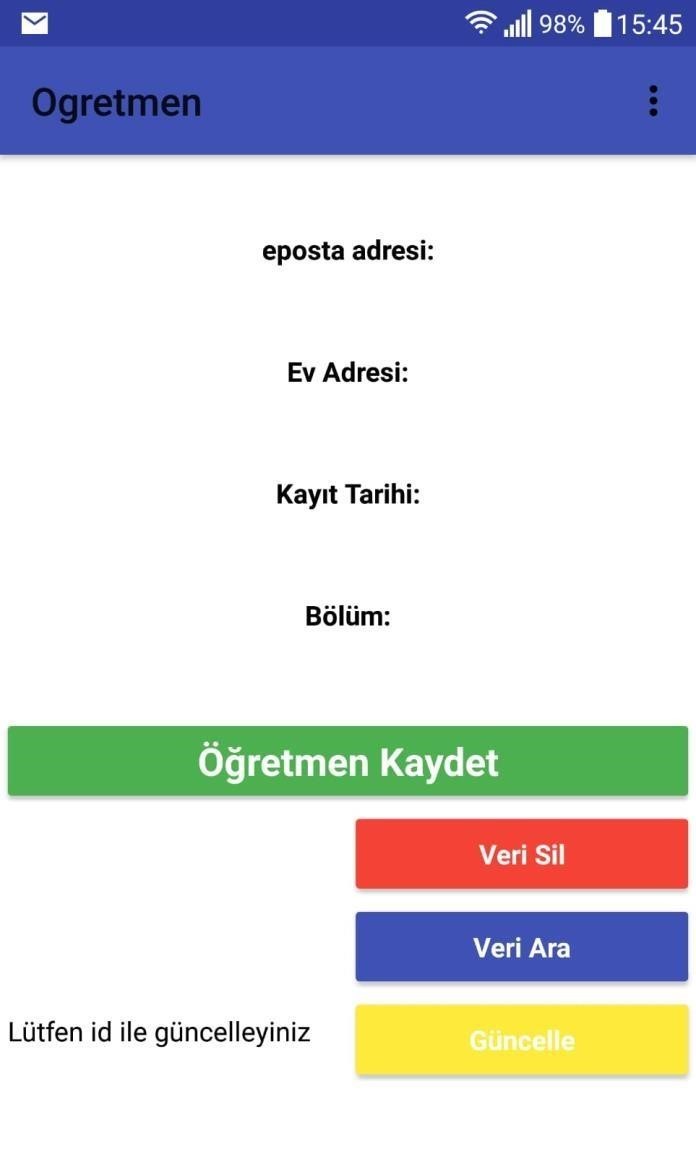
Class Department
Unlike student enrollment here "Sınıf" button has been changed to "Bölüm" name.
ARTICLE DEMO
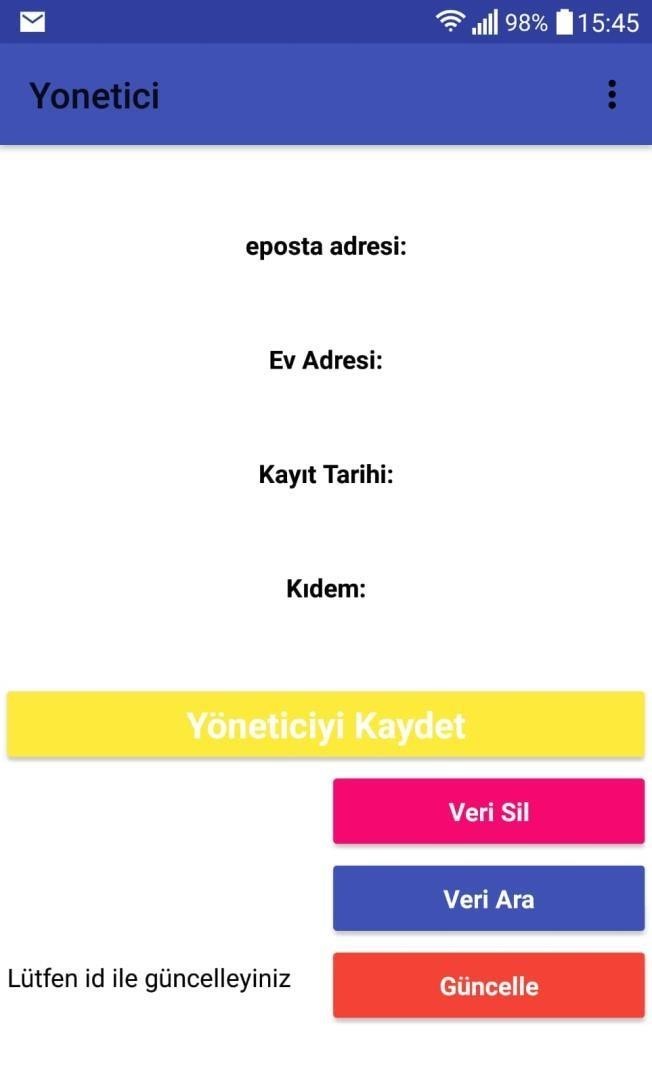
Seniority
As can be seen, the button named “Kıdem” is defined in the manager registration, unlike the others.
Back Next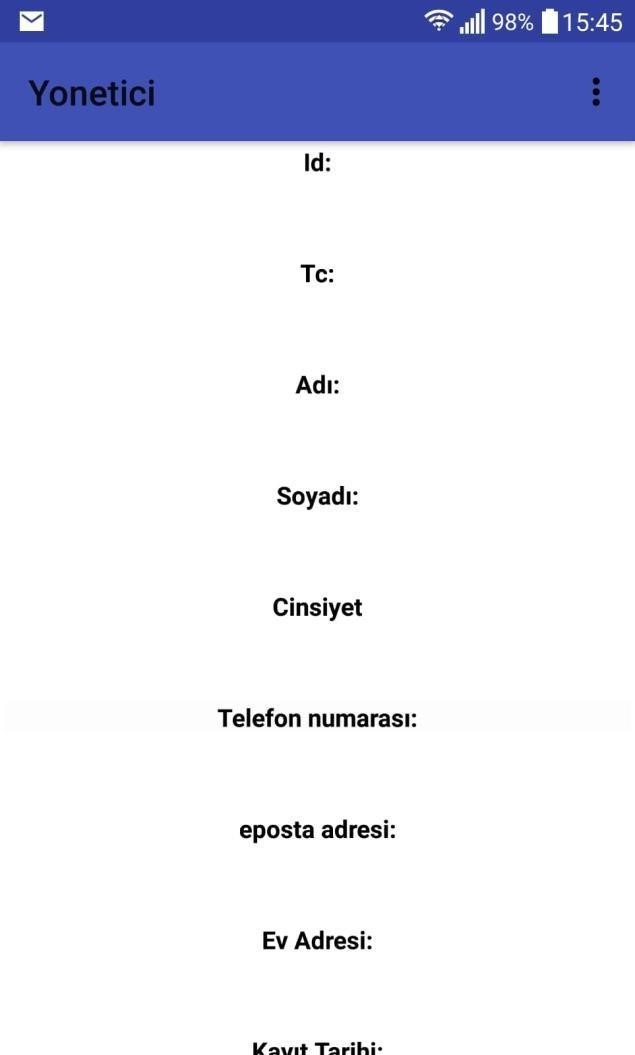
Update Data
The "Veri Güncelle" button recreates all these forms in the id (via id) for the first time, then all the forms filled in on the record.
Back Next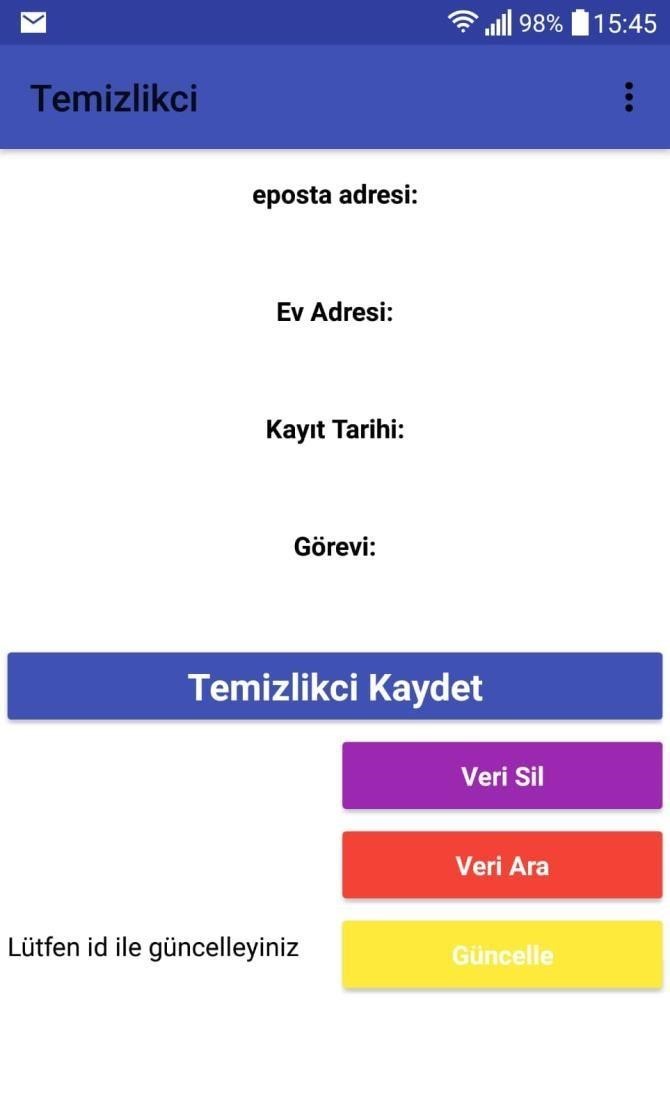
task
It is the same with other registration forms, only the label named "Görev" is written.
Back Next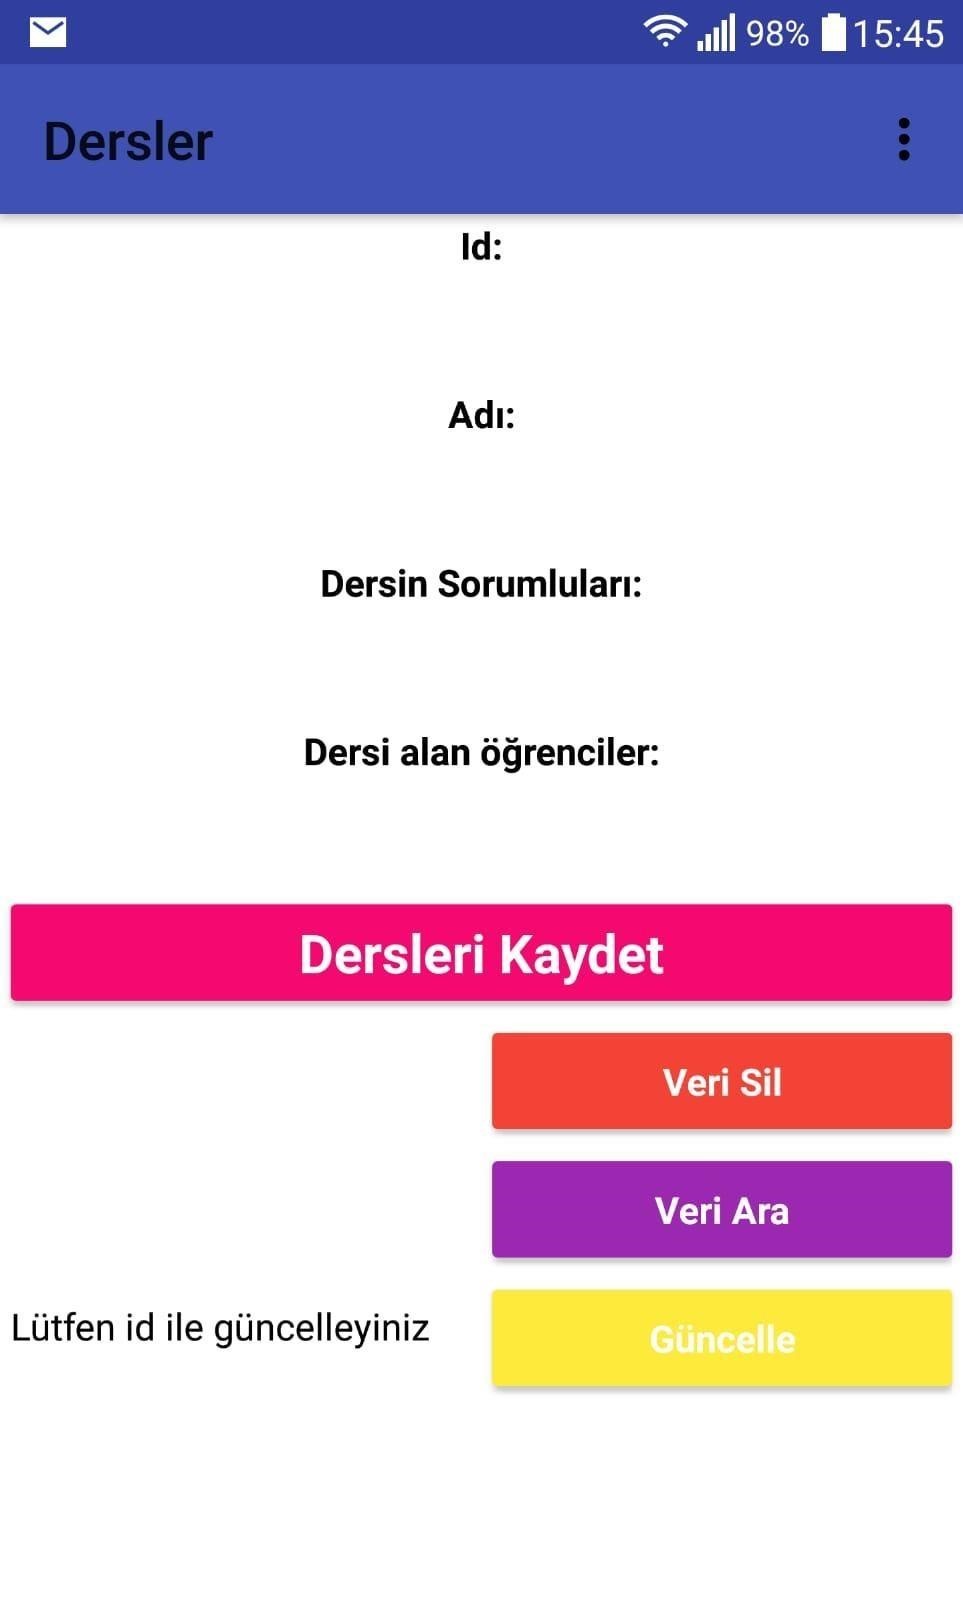
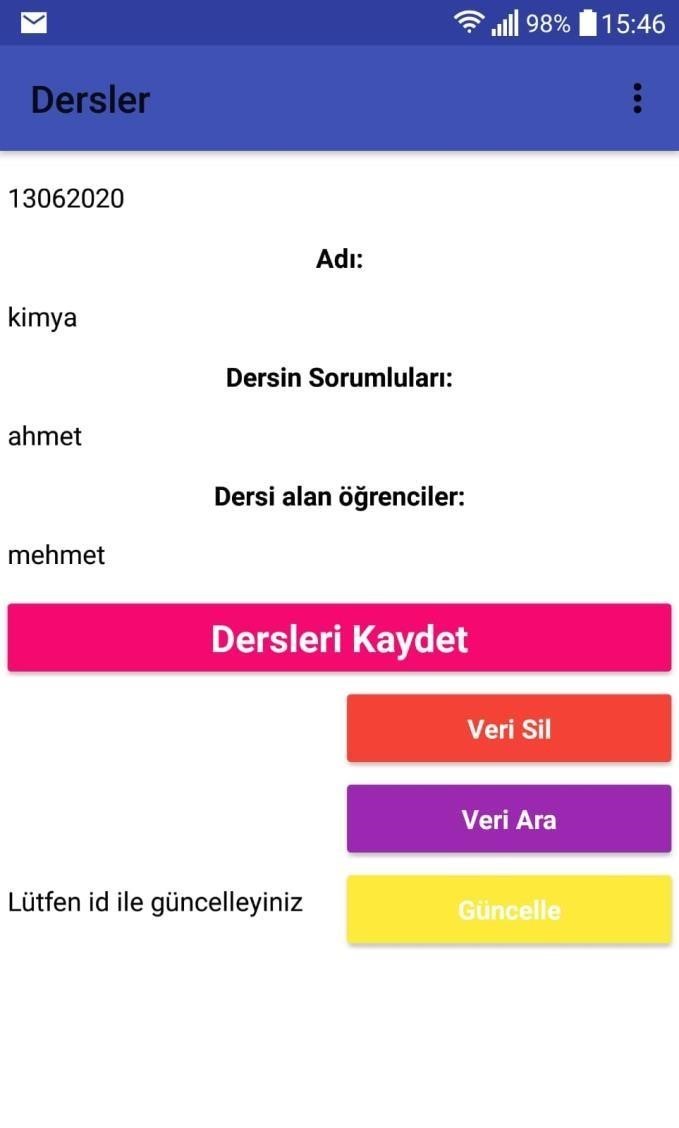
Information on Working Order
For example, we define an id named “13062020” and then we register to our database with the “Dersleri Kayıdet” button.
Back Next
Save Lessons
I can call the id named "13062020" with the "Search Data" button. The working system of these codes is shown on the other page.
Back Next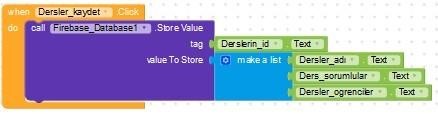
Make a list
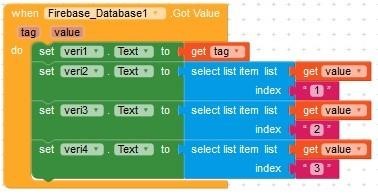
Clicking "Save Lessons" connects to the server and instead of "id" textbox (for this page it takes from "courses_id") and creates a block with the name that id. "Make a list" on this block sorts the data in the textbox.
Back Next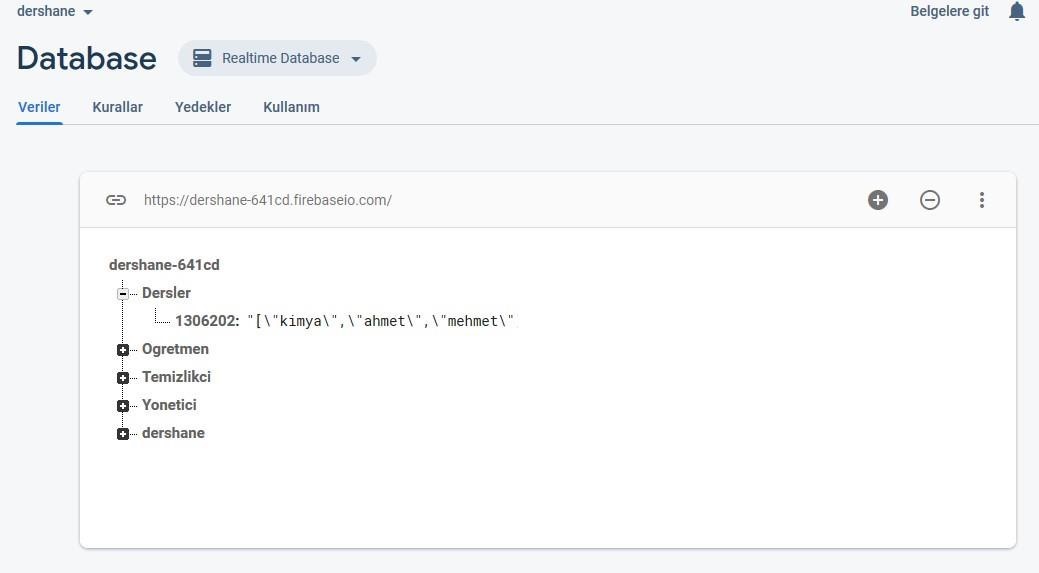

Search Data
With the basicization via "Search Data", it is first connected to the server and then named "data_arama_copy_copy". The feeding of that id is called from textbox (textbox called please enter) and then it is written to the labels in order.
.
.
.
Back Next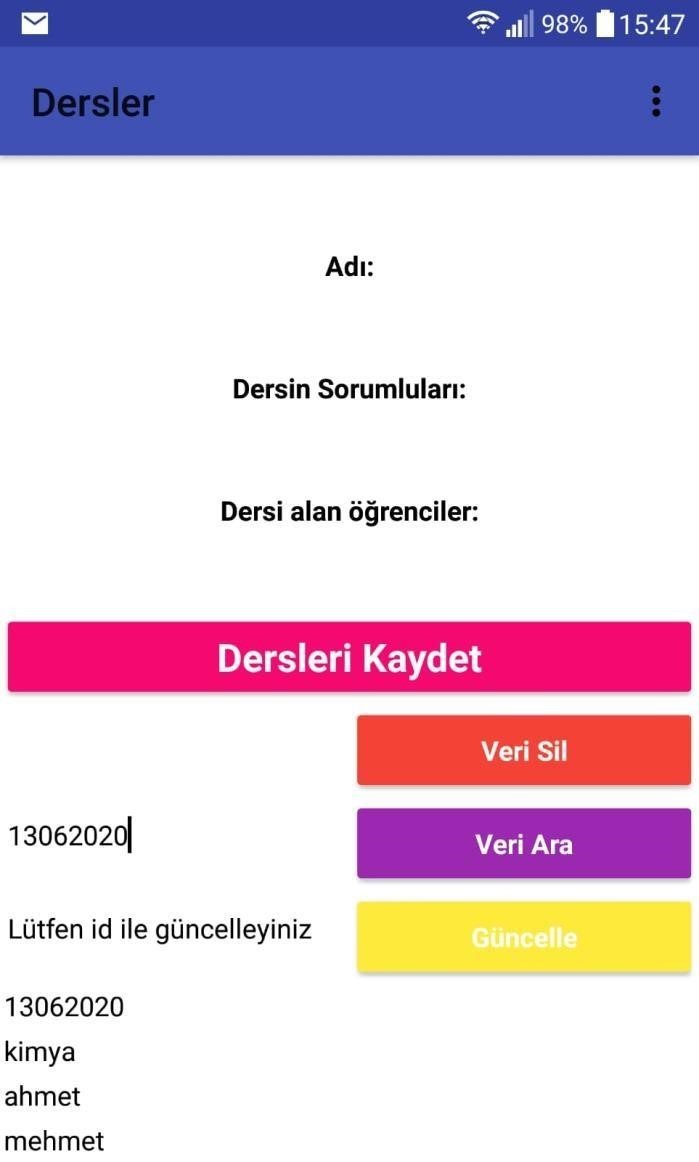
Update
To update the id named "13062020", its updated version is written, and then with the "update" button, the new data is created with the same id.
Back Next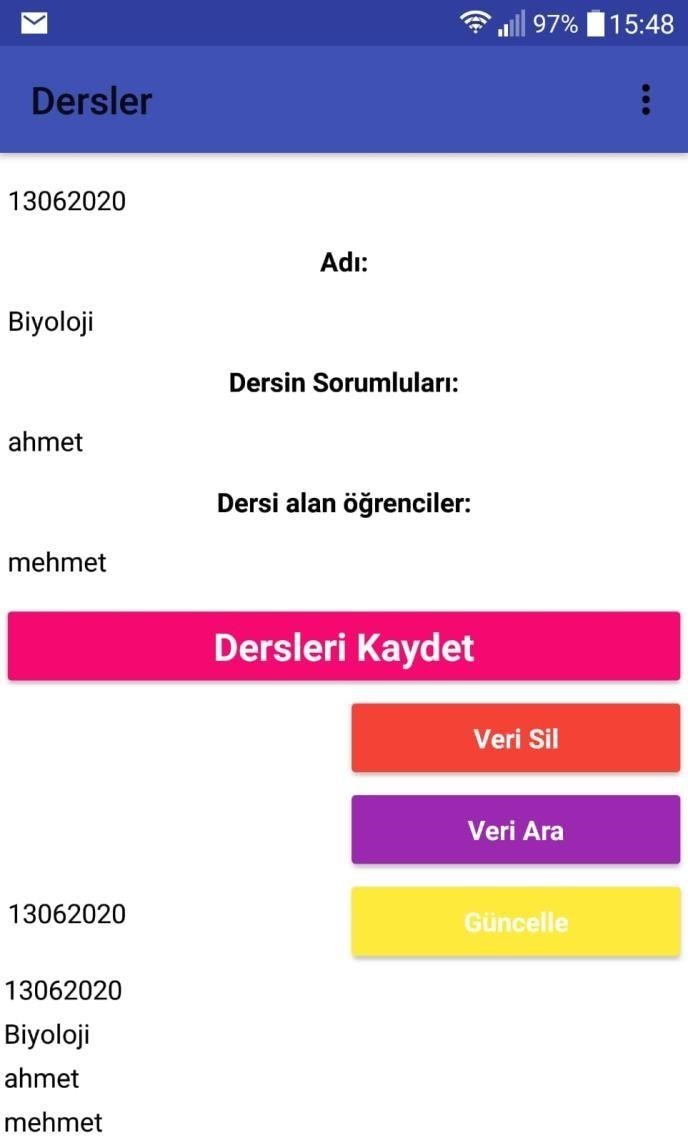
Update
To update the id named "13062020", its updated version is written, and then with the "update" button, the new data is created with the same id.
Back Next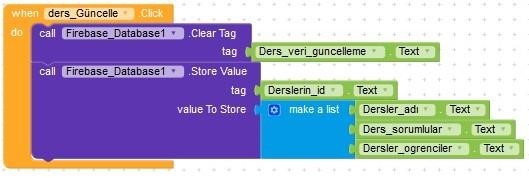
Update Lesson
When the "Update Lesson" button is clicked, first "Course_data_guncelle" is deleted in the id database from the textbox. Afterwards, the data is recorded through the new order in the forum. These records are list ”command from textboxes (eg: “Courses_name”) is transferred to the database as sample entries.
Back Next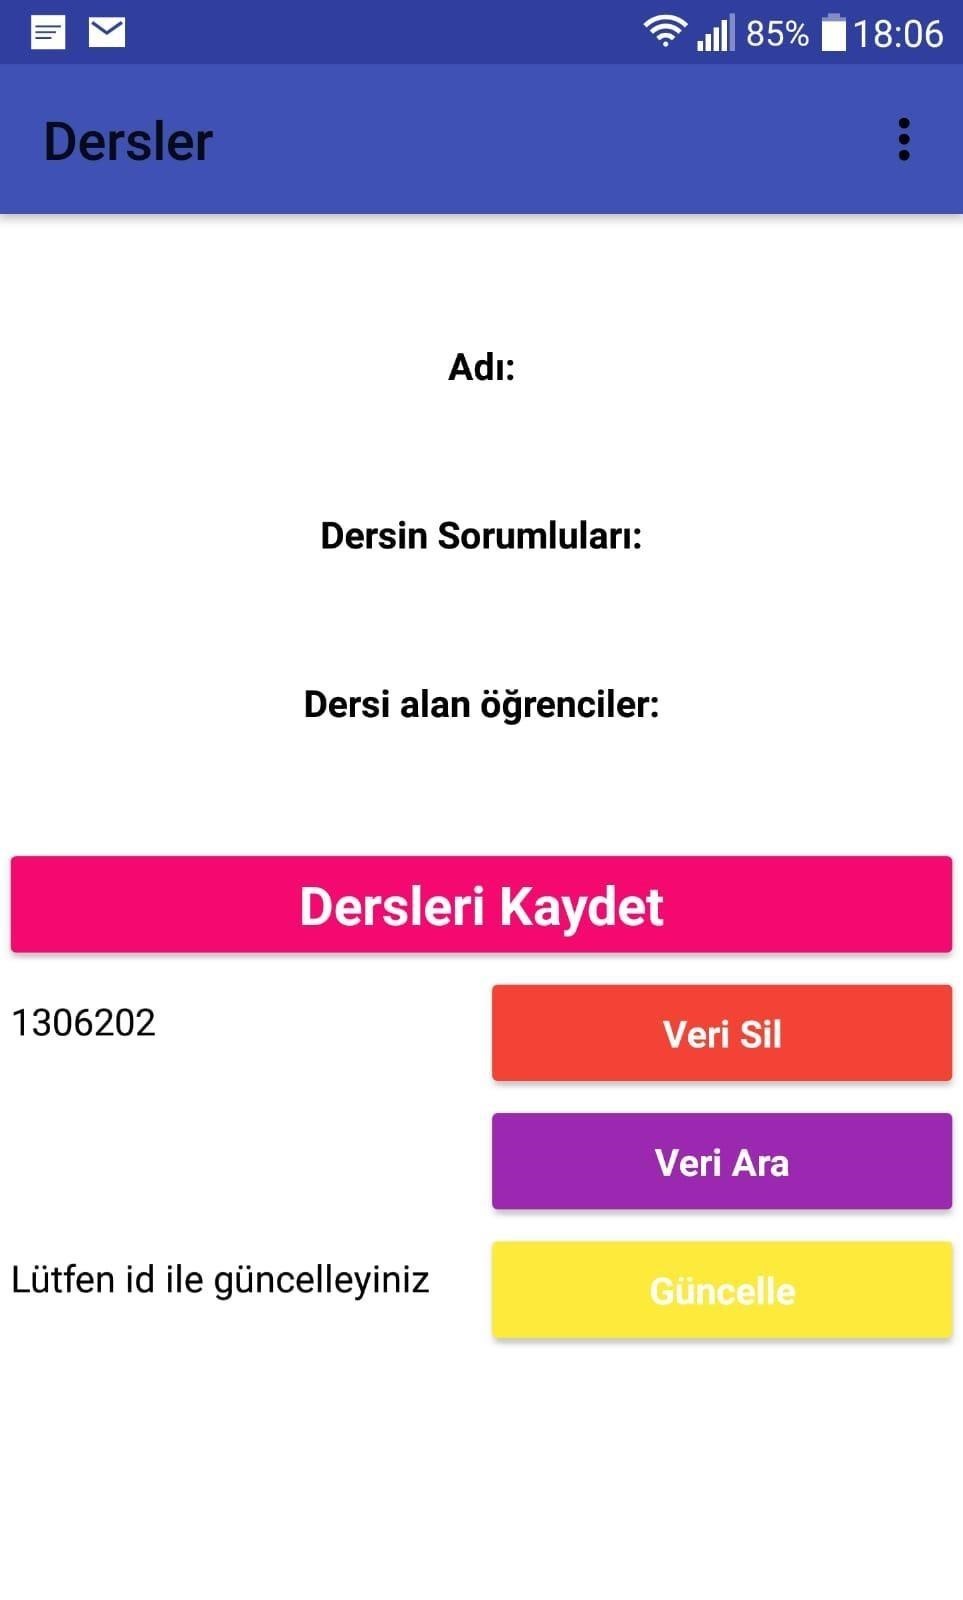
Delete Data
Deletes sequential data after pressing “Delete Data” by entering the id named “1306202”.
Back Next
Remove First
By pressing the "data_delme_copy" button, the database is connected. After the "Remove First" command from the database, into the textbox ("Data_input_copy to be deleted") over the entered id, the data is deleted starting from the first data.
Back Next
Update
To update the id named "13062020", its updated version is written, and then with the "update" button, the new data is created with the same id.
Back Next